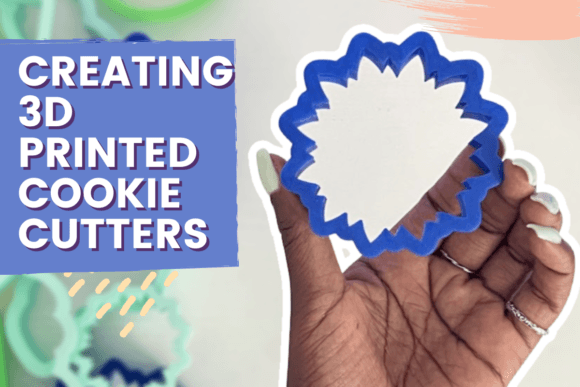
Creating 3D Printed Cookie Cutters: A Design Guide
There is a distinct satisfaction in holding a tool that exists solely because you imagined it. Creating 3D printed cookie cutters bridges the gap between digital design and tactile tradition, transforming abstract vector lines into physical objects that shape real-world experiences. This process is more than just manufacturing kitchenware; it is an exercise in functional creativity that allows bakers, marketers, and hobbyists to produce bespoke items impossible to find in commercial stores. When you design your own cutter, you are not limited by inventory or standard shapes. You are constrained only by your imagination and the physics of extrusion.
In this class, we focus on demystifying the technical workflow required to bring these designs to life. We will use a computer tablet tool to design a simple PNG, convert it to an STL file, and finally generate a 3D print. This streamlined pipeline removes the intimidation factor often associated with CAD software, making custom fabrication accessible to creators who may not have engineering backgrounds. Whether you are using the Sunflower design provided in the Materials and Tools section or sketching your own logo, the principles remain consistent: clarity, safety, and printability.
From Digital Sketch to Physical Tool
The journey begins with understanding the relationship between 2D imagery and 3D geometry. A common misconception is that any image can be instantly printed. In reality, successful cookie cutters require clean, continuous vectors. When using a tablet to create your initial PNG, prioritize bold lines and simplified silhouettes. Intricate internal details often fail during the slicing process or result in dough sticking to the cutter. The goal is to capture the essence of the shape rather than every minute texture.
Converting that PNG to an STL file is where the magic happens. This step adds depth and structural integrity to your flat design. For cookie cutters, wall thickness is critical. A rim that is too thin will warp under baking temperatures or slice through dough too aggressively, while a rim that is too thick will crush the cookie rather than cut it. Most successful designs utilize a cutting edge between 0.4mm and 0.8mm, with a reinforced spine for grip. Understanding these parameters ensures that your digital creation functions effectively as a kitchen tool.
Creative Applications for Diverse Audiences
The utility of creating 3D printed cookie cutters extends far beyond personal baking projects. Different professionals can leverage this skill to solve unique problems or enhance their offerings. The ability to rapidly prototype and produce custom shapes opens doors across various industries.
- Small Business Owners: Create branded merchandise that aligns perfectly with product launches. A coffee shop could offer cookies shaped like their new latte art, or a bookstore could host events featuring literary-themed treats.
- Educators: Turn lessons into sensory experiences. Geometry classes can explore tessellations through interlocking cookie shapes, while history lessons might feature period-accurate symbols or artifacts.
- Event Planners: Coordinate wedding favors or party activities with hyper-specific themes. Instead of generic hearts or stars, design cutters that match the couple’s monogram or the event’s unique mascot.
- Content Creators: Develop signature visual assets for food photography. Custom shapes become part of your brand identity, making your content instantly recognizable in crowded social feeds.
Designing for Safety and Functionality
When designing for food contact, safety must precede aesthetics. Not all 3D printing materials are suitable for culinary use. Standard PLA is generally considered safe for brief contact with dough, but additives, colorants, and nozzle residues can pose risks. Always verify that your filament is certified food-safe and free from toxic heavy metals. Furthermore, the layer lines inherent in FDM printing can harbor bacteria. Many designers coat their finished cutters in food-grade epoxy or use them exclusively for single-use events to mitigate hygiene concerns.
Beyond material safety, ergonomic design dictates usability. A cutter that looks beautiful on screen but hurts to press into stiff dough will ultimately be abandoned. Consider adding a handle or widening the top flange to distribute pressure evenly across the user's palm. Test prints are essential here. Print a small section of the cutter first to check tolerances before committing to a full print. This iterative approach saves time, filament, and frustration.
Optimizing Your Workflow for Consistency
Efficiency matters when you move from experimentation to production. Establishing a standardized workflow ensures that every cutter you create meets the same quality benchmarks. Start by organizing your digital assets. Keep original PNGs separate from processed STL files, and maintain a naming convention that includes dimensions and version numbers. This organization becomes invaluable when you need to resize a design months later or share files with collaborators.
Slicing settings also play a massive role in consistency. Create a dedicated profile for cookie cutters within your slicer software. This profile should optimize for vertical strength and smooth outer walls rather than speed. Using a smaller nozzle, such as 0.25mm, can dramatically improve the resolution of fine details without requiring post-processing. Document these settings so you can replicate successful results regardless of which printer you use.
Expanding Beyond Traditional Cookies
While we call them cookie cutters, these tools are essentially modular shaping devices. The skills learned in this class apply to fondant, modeling chocolate, polymer clay, and even soap making. Each medium has different viscosity and elasticity, requiring slight adjustments to your design. Clay, for example, requires sharper angles and deeper relief than sugar cookie dough. By mastering the fundamental design principles, you gain the flexibility to adapt your creations for multiple crafts.
Consider the seasonal potential of your designs. A single base shape can be modified with interchangeable inserts or overlays to suit different holidays. A simple circle becomes a wreath for December, a sun for July, or a plate for everyday use. This modularity maximizes the return on your design investment and keeps your creative output fresh throughout the year.
Maintaining Originality in a Shared Space
The 3D printing community is vast, and thousands of cookie cutter designs already exist online. However, true value lies in original interpretation. Rather than downloading existing files, use them as inspiration for your own variations. Analyze what makes certain designs popular—is it the nostalgia, the clever negative space, or the ease of cleaning? Apply those insights to your unique concepts.
If you plan to sell your physical cutters or digital files, respect intellectual property. Avoid reproducing copyrighted characters or trademarked logos. Instead, develop a distinctive style that sets your work apart. Perhaps you specialize in botanical accuracy, geometric minimalism, or whimsical caricatures. A cohesive aesthetic builds trust and recognition, turning a technical skill into a sustainable creative practice.
Practical Next Steps for Learners
As you prepare for this class, ensure your workspace is ready for both digital and physical tasks. Download the Sunflower design from the Materials and Tools section to serve as your baseline reference. Familiarize yourself with your tablet’s drawing interface before the session begins; comfort with the tool allows you to focus on design principles rather than button placement. Verify that your 3D printer is calibrated and leveled, as first-layer adhesion is crucial for thin-walled objects.
Remember that failure is data. Your first few cutters may be too fragile, too dull, or difficult to clean. Each iteration teaches you something about the intersection of digital precision and organic material behavior. Embrace the learning curve. The objective is not perfection on the first attempt, but the development of a reliable creative process that serves your specific goals. Whether you aim to delight family members, enhance a business offering, or simply explore a new medium, creating 3D printed cookie cutters offers a tangible reward for digital effort.